September 22, 2006
Ball Elevator - Part 2
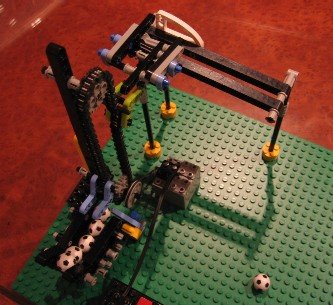 Continued on with the Ball Elevator grand contraption last night. As you can see, I have made some progress.
A motor has been attached to propel the elevator. For the moment it's just attached to a battery box - a rather convenient device. At some point I might need to control it all with an RCX, but I don't have a reason to use one at the moment.
At right is a close-up of the upper landing area for the balls. Catching the balls after being thrown by the little lift chairs is rather difficult.
 Anything that will catch the balls will likely get in the way of the chairs. After many attempts at something that would reliably, and if possible, elegantly catch the elevated balls, the result was very much like the hopper at the bottom. It's essentially three liftarms in parallel, with the one in the middle one stud lower then the outside ones. Some 2L thin liftarms (light blue) hold the two levels together. The middle liftarm sticks out a little closer to the chain. When the chair goes by, it fits between the two liftarms that make the chair. It took lots of placement adjustment to get that to work correctly.
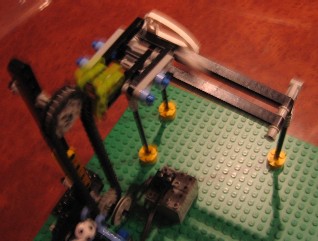 When the ball hits the end of this first ramp, it takes a right turn onto another ramp composed (for the moment, at least) of two longer liftarms.
The last pictures is a bad action shot. A blurry ball is making it's way down the longer ramp. Someday I'll make a setup for taking pictures with better lighter for faster shutter speeds. Or I could take the pictures during daylight. What a concept!
![]()